• Skip to primary navigation
  • Skip to main content
  • Skip to primary sidebar
  • About
  • Recipes
  • Auntie's Favorites
  • Holidays
    • New Year's
    • Valentine's Day
    • St. Patrick's Day
    • Easter
    • 4th of July
    • Halloween
    • Thanksgiving
    • Christmas
  • Subscribe

Crinkled Cookbook logo

menu icon
go to homepage
  • Christmas
  • Recipes
  • About
  • Subscribe
    • Instagram
    • Pinterest
  • subscribe
    search icon
    Homepage link
    • Christmas
    • Recipes
    • About
    • Subscribe
    • Instagram
    • Pinterest
  • ×
    Home » Recipes » Summer Recipes

    Published: Jul 16, 2025 by Melinda O'Malley Keckler · This post may contain affiliate links · this blog generates income from ads.

    Easy Raspberry Jam (No Pectin, No Canning)

    Jump to Recipe Print Recipe

    Easy Raspberry Jam is a back-to-basics recipe that lets the natural flavor of raspberries shine. If you've ever wondered how to make homemade raspberry jam without pectin, this easy small-batch method is all that you need. Gather fresh raspberries, sugar, lemon juice and a pinch of salt and you're all set. No fancy tools or canning required!

    Easy small batch raspberry jam in jars on a cutting board.
    Jump to:
    • ⭐ Why Melinda Loves Easy Raspberry Jam
    • 🍋 Ingredients to Have on Hand
    • 🥣 Step-by-Step Instructions
    • ⭐ Pro Tip
    • 💭 Recipe FAQs
    • 🍓Substitutions
    • ♨️ How to Know if Your Jam is Done Cooking
    • ⭐ Pro Tip
    • 👩🏻‍🍳 How to Store Easy Raspberry Jam
    • 🍽 More Summer Recipes
    • Recipe
    • Comments

    ⭐ Why Melinda Loves Easy Raspberry Jam

    Melinda in the kitchen holding a plate of chocolate cake slices.

    First time making jam? This is a great, easy-to-make homemade raspberry jam for beginners.

    No canning needed. Easy storage in the freezer for up to a year. Perfect for gifting! Share a jar along with a container of Homemade Honey Butter or a little bag of Spiced Walnuts.

    It makes a small batch of jam and is a great way to use up a few cups of fresh raspberries.

    🍋 Ingredients to Have on Hand

    Ingredients for small batch raspberry jam.

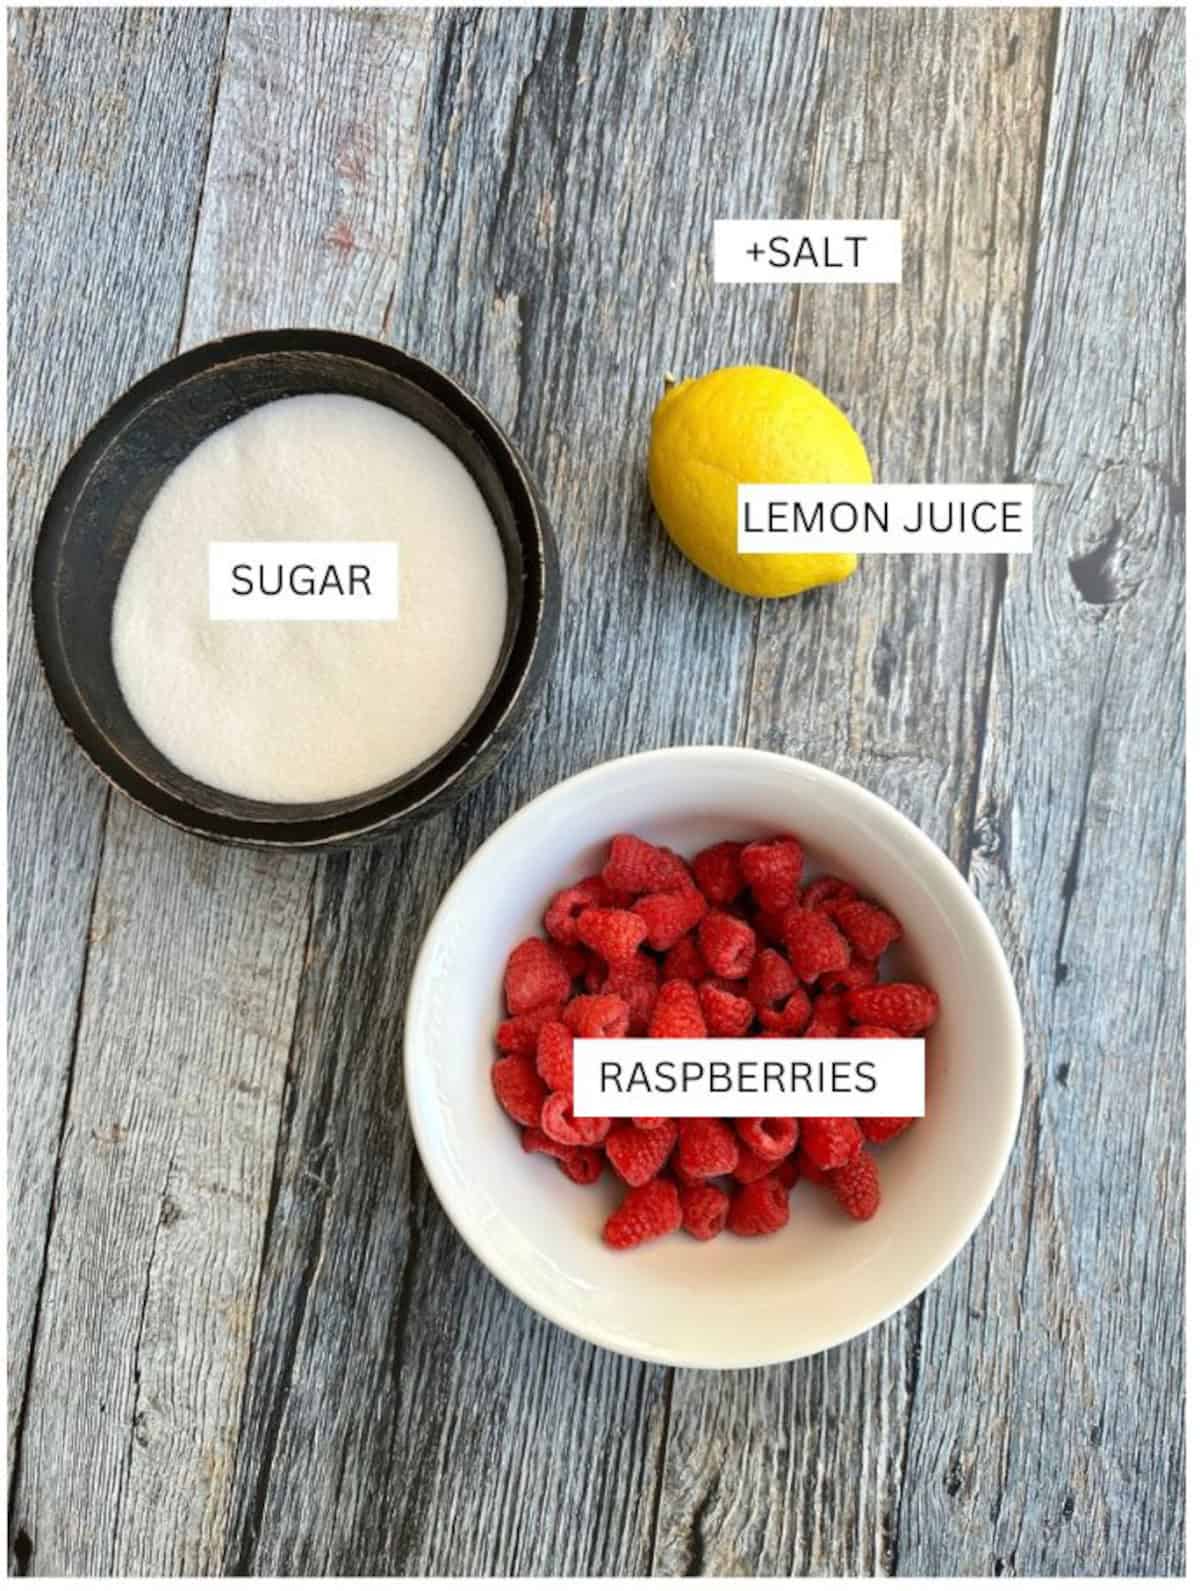
    Fresh Raspberries: One of the best things about making homemade jam with raspberries is that there's no peeling or pitting needed. Just rinse them off, and you are ready. Plus, since this is a small batch jam recipe, you only need 4 cups of berries. If you have extra berries, make a delicious Fresh Fruit Tart with Shortbread Crust or Croissant Bread Pudding!

    Sugar: This adds sweetness to the fresh raspberries, but during the cooking process, it also helps the natural pectin in the fruit bond and create a gel. Sugar is an important ingredient; it helps give homemade jam its familiar, spreadable texture.

    Lemon Juice: The fresh lemon juice adds natural pectin to the jam, which helps it thicken, while also adding a little bright tartness to the jam.

    Salt: There's just a tiny amount of salt in this recipe, but it helps enhance the flavor of the raspberries.

    Scroll to the recipe card below for a full ingredient list, including the measurements.

    🥣 Step-by-Step Instructions

    This easy homemade raspberry jam thickens beautifully without added pectin, just simple ingredients and a few time-tested techniques. My mom has been making this recipe for years, it's as tried and true as her beloved Old-Fashioned Strawberry Rhubarb Pie!

    A fork mashing fresh raspberries in a pan on the stove.

    Step 1: Rinse the berries, then place them in a 2 or 3-quart saucepan on the stove. Use a fork or potato masher to gently mash some of the berries to release some of their liquid.

    Raspberry jam simmering in a pan on the stove.

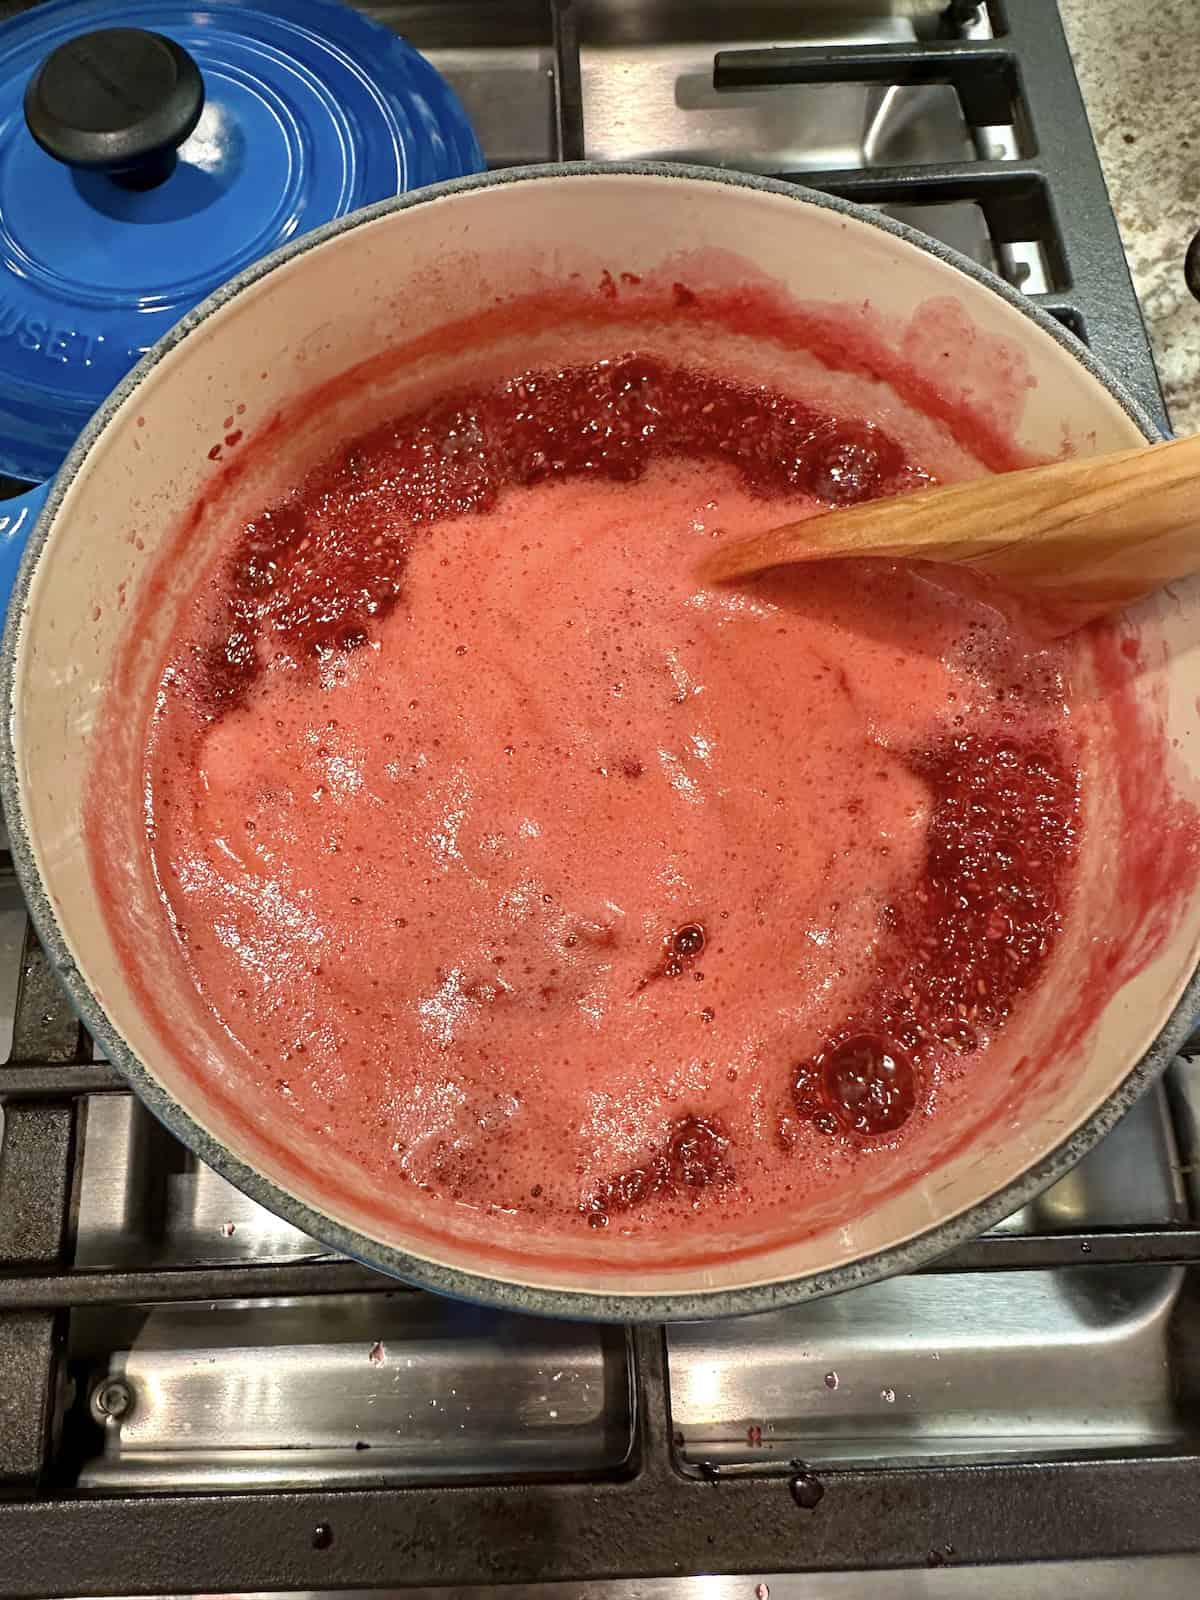
    Step 2: Turn the heat to high and bring the raspberries to a boil.

    Raspberry jam boiling on the stove, no pectin and no canning.

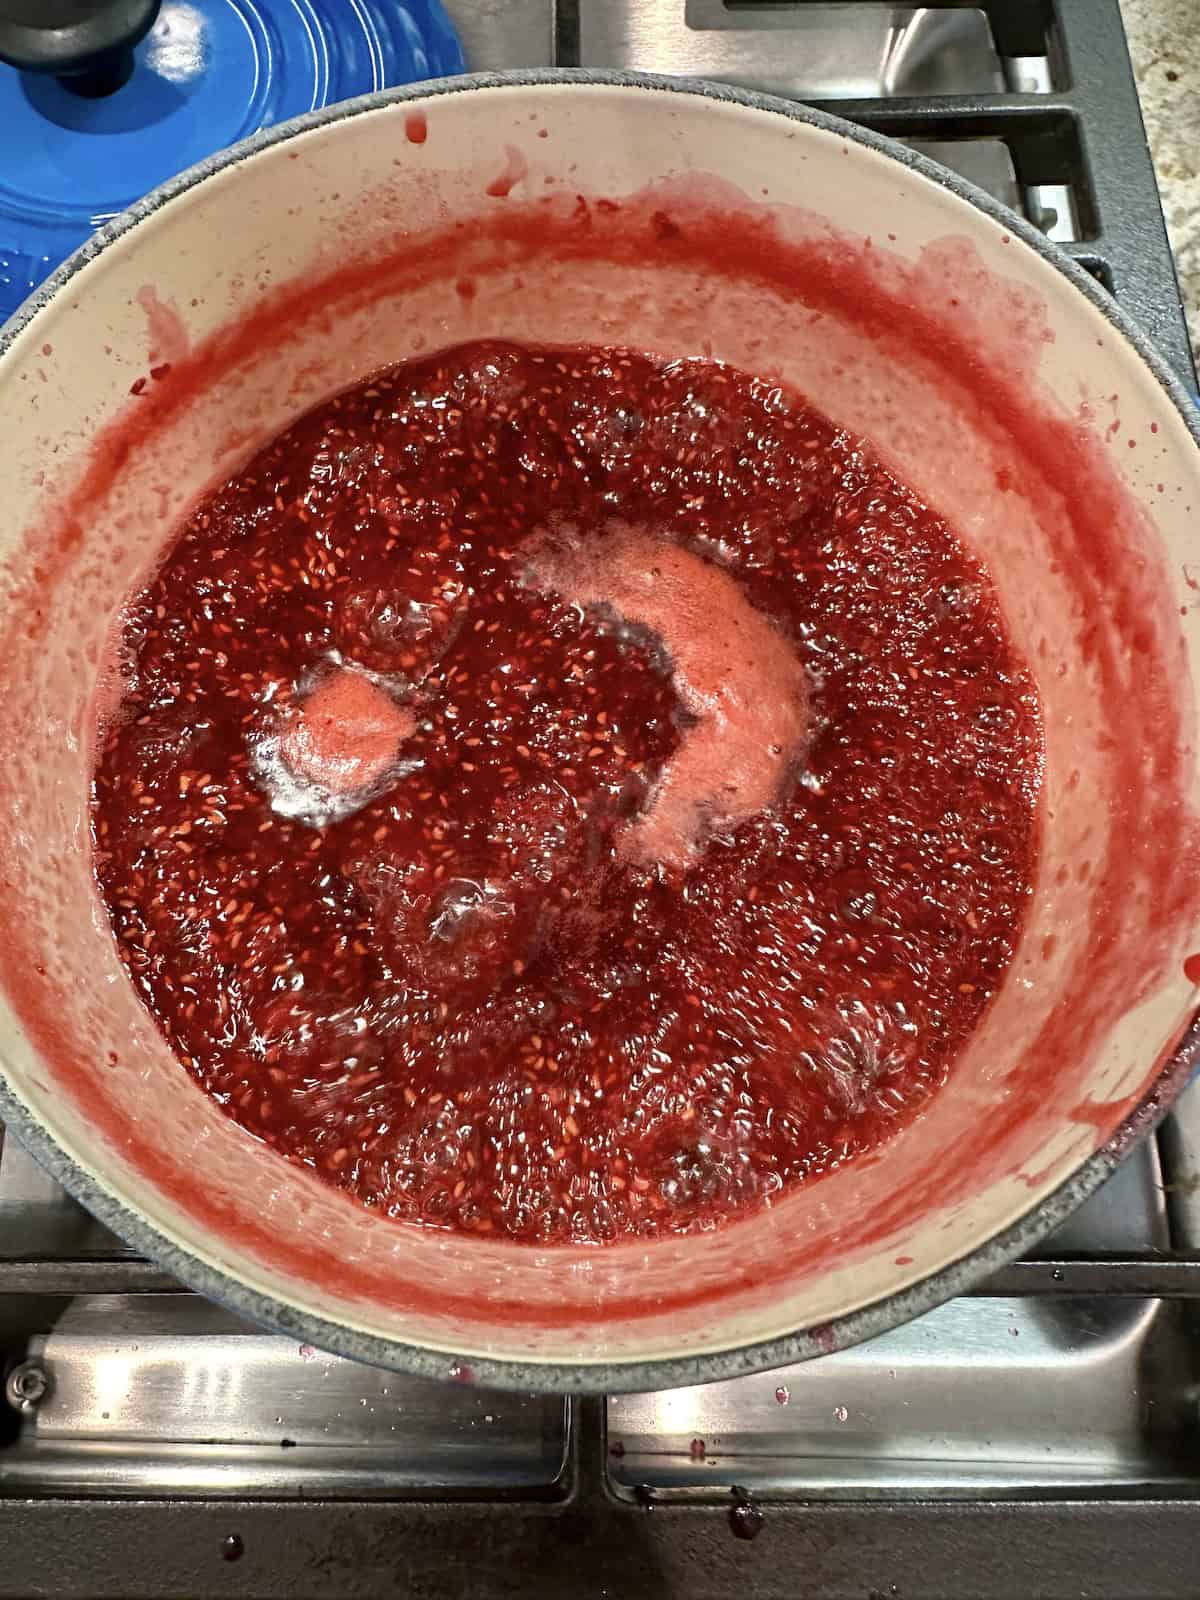
    Step 3: Add the sugar, lemon juice and salt and continue simmering for 10-15 minutes, until the sugar reaches the soft-ball stage. This ensures the raspberry mixture will have the consistency of jam. (Be assured. It's easy to do this. Scroll down for details on how to know when the jam is done.)

    Small batch raspberry jam in a glass measuring cup.

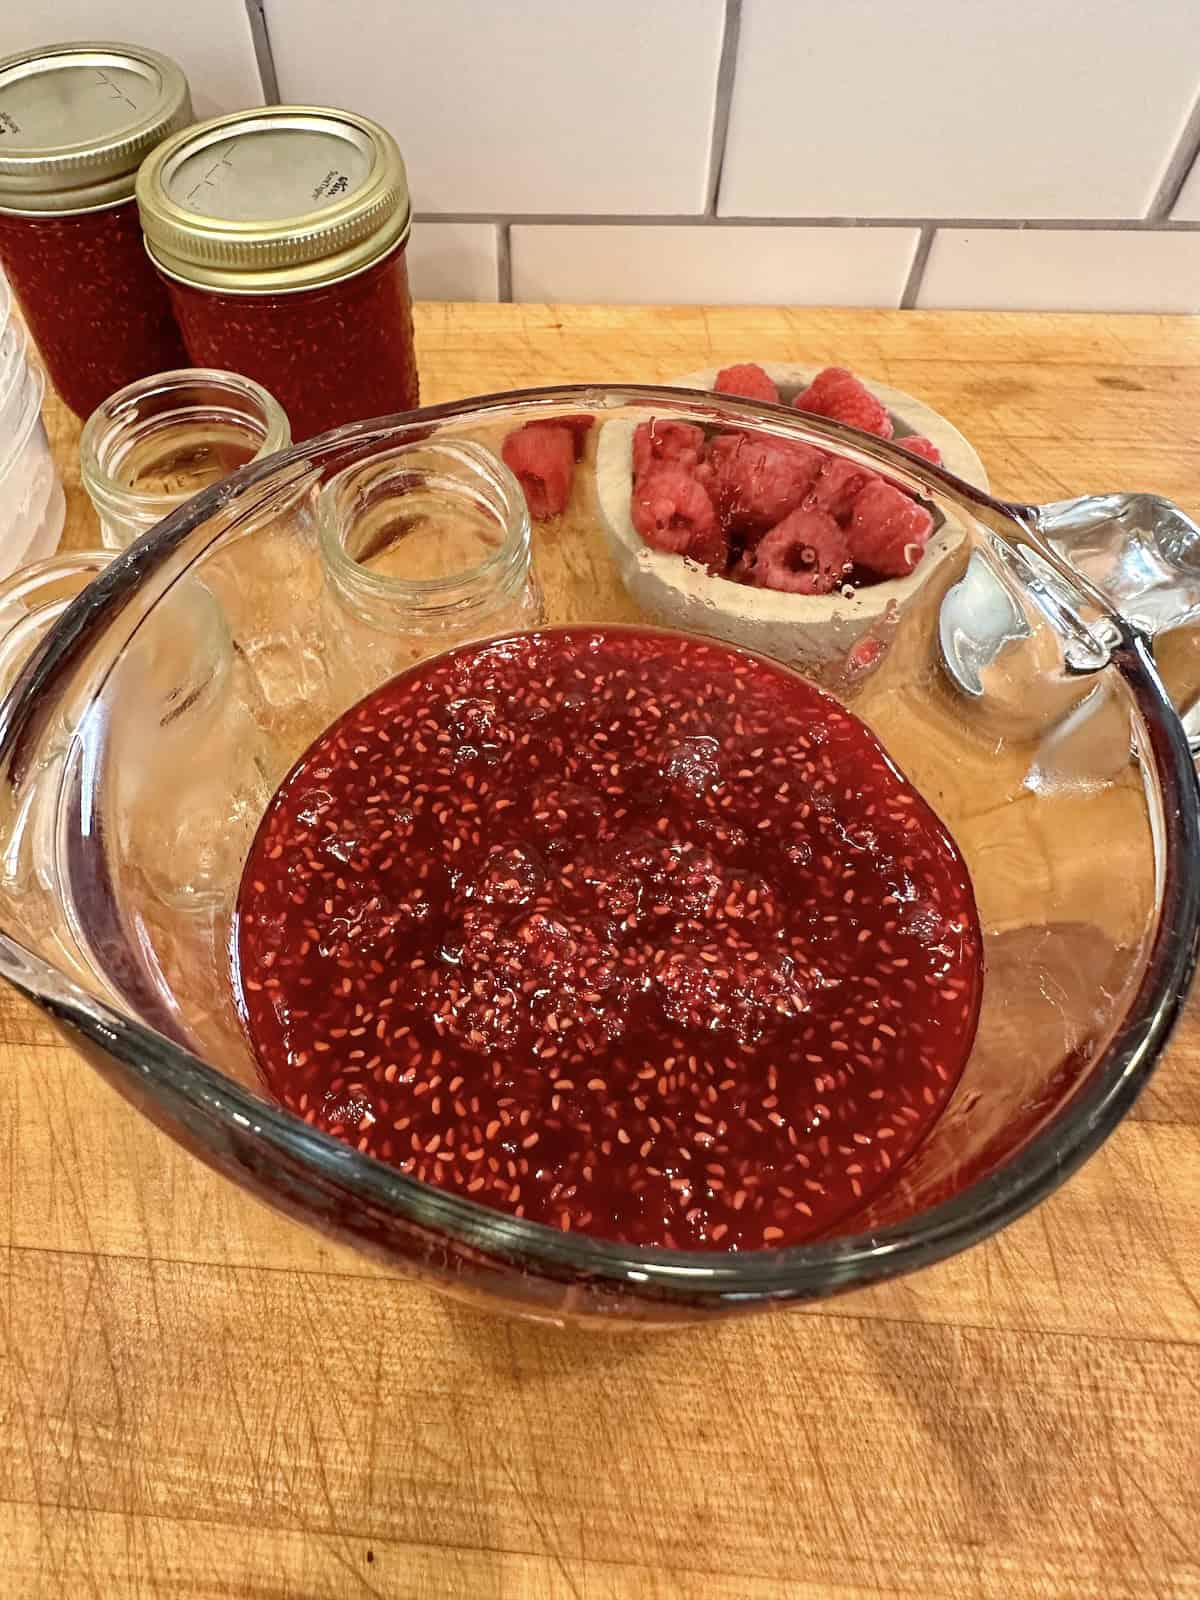
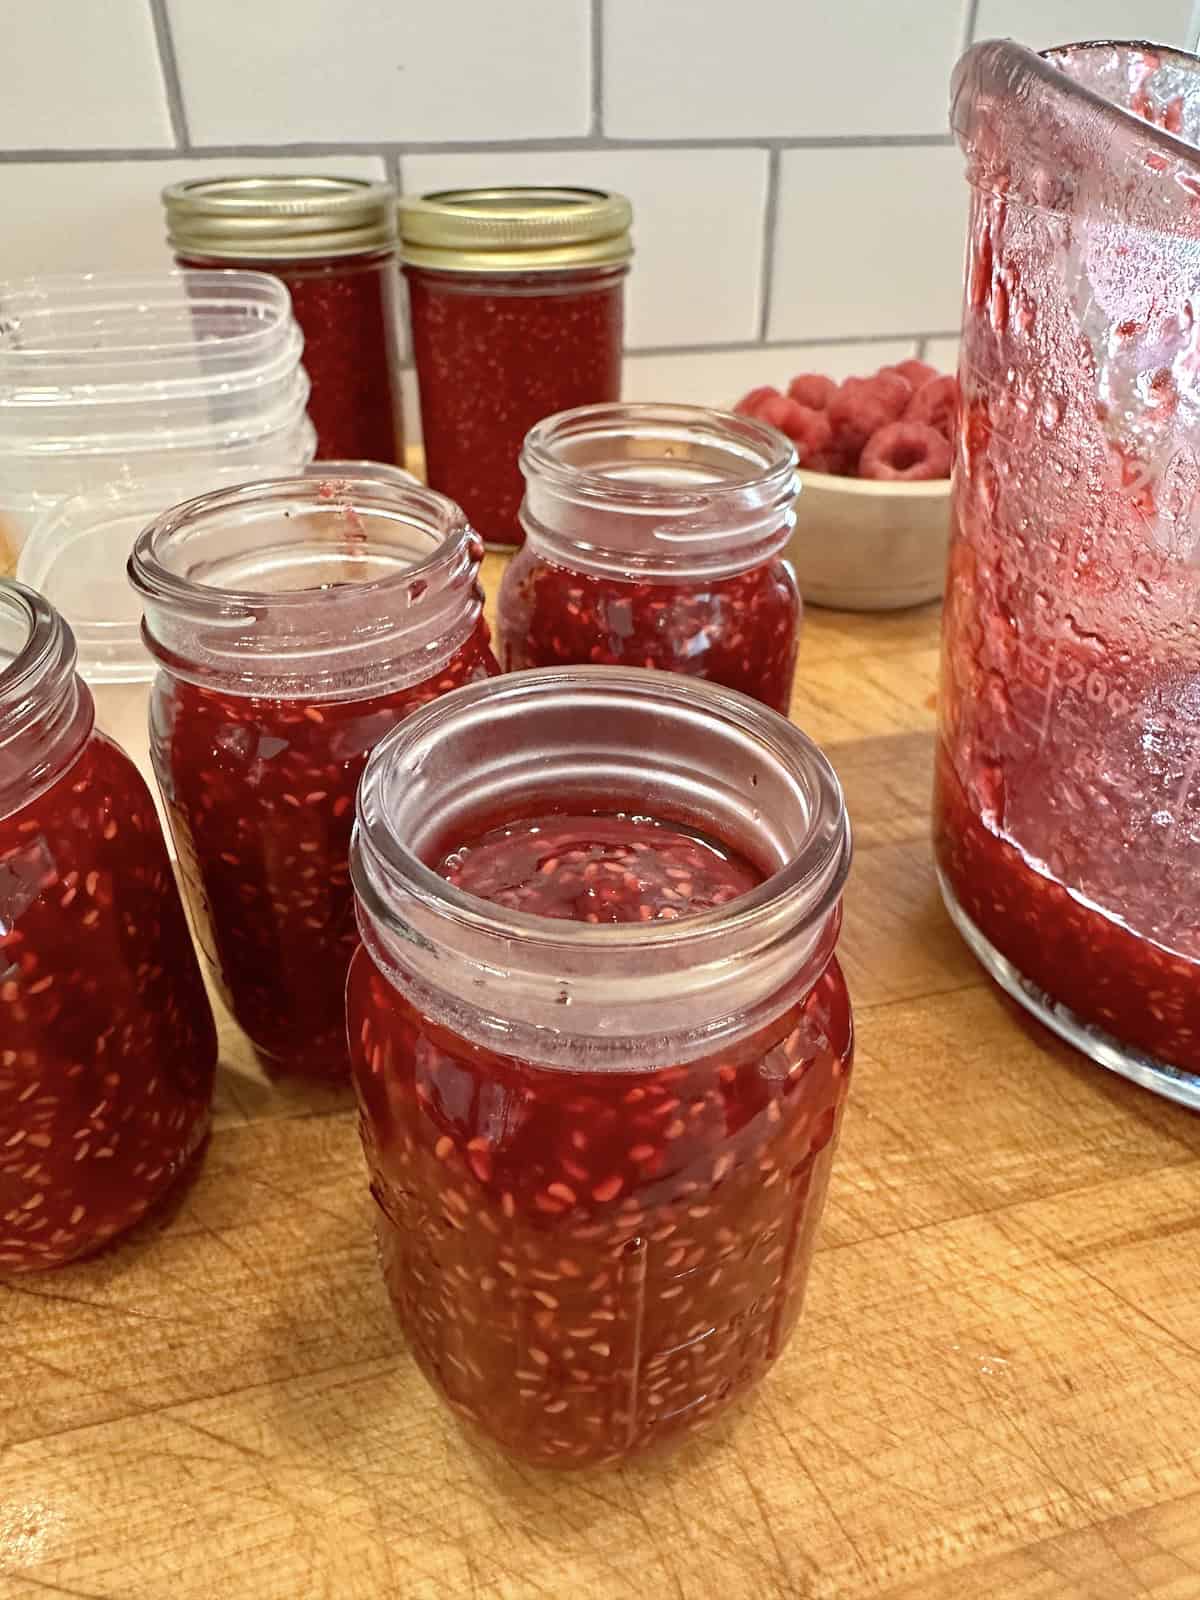
    Step 4: Pour the jam mixture into a large glass measuring cup with a spout. Let set and cool for 10 minutes.

    A small jar being filled with raspberry jam.

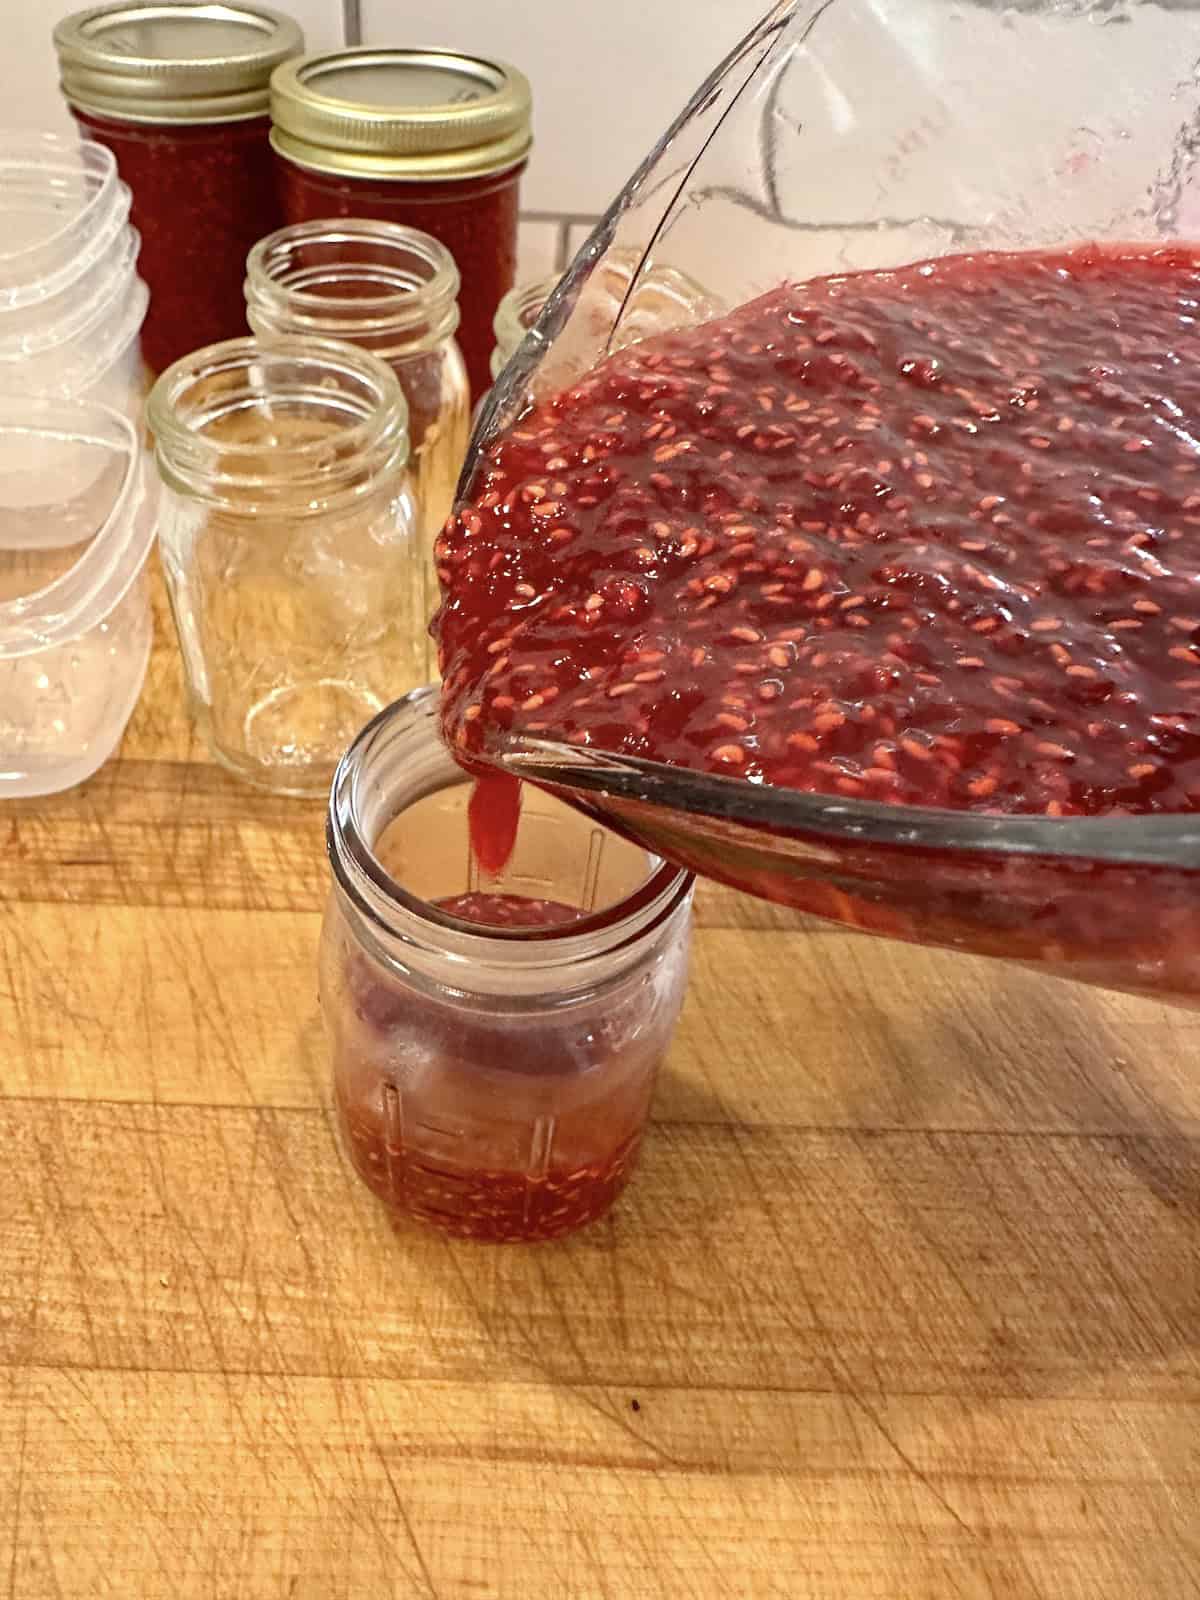
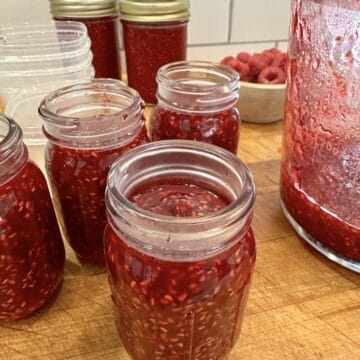
    Step 5: Pour the raspberry jam into clean jars. This makes about 2 ½ cups of jam.

    Easy, small batch raspberry freezer jam in jars.

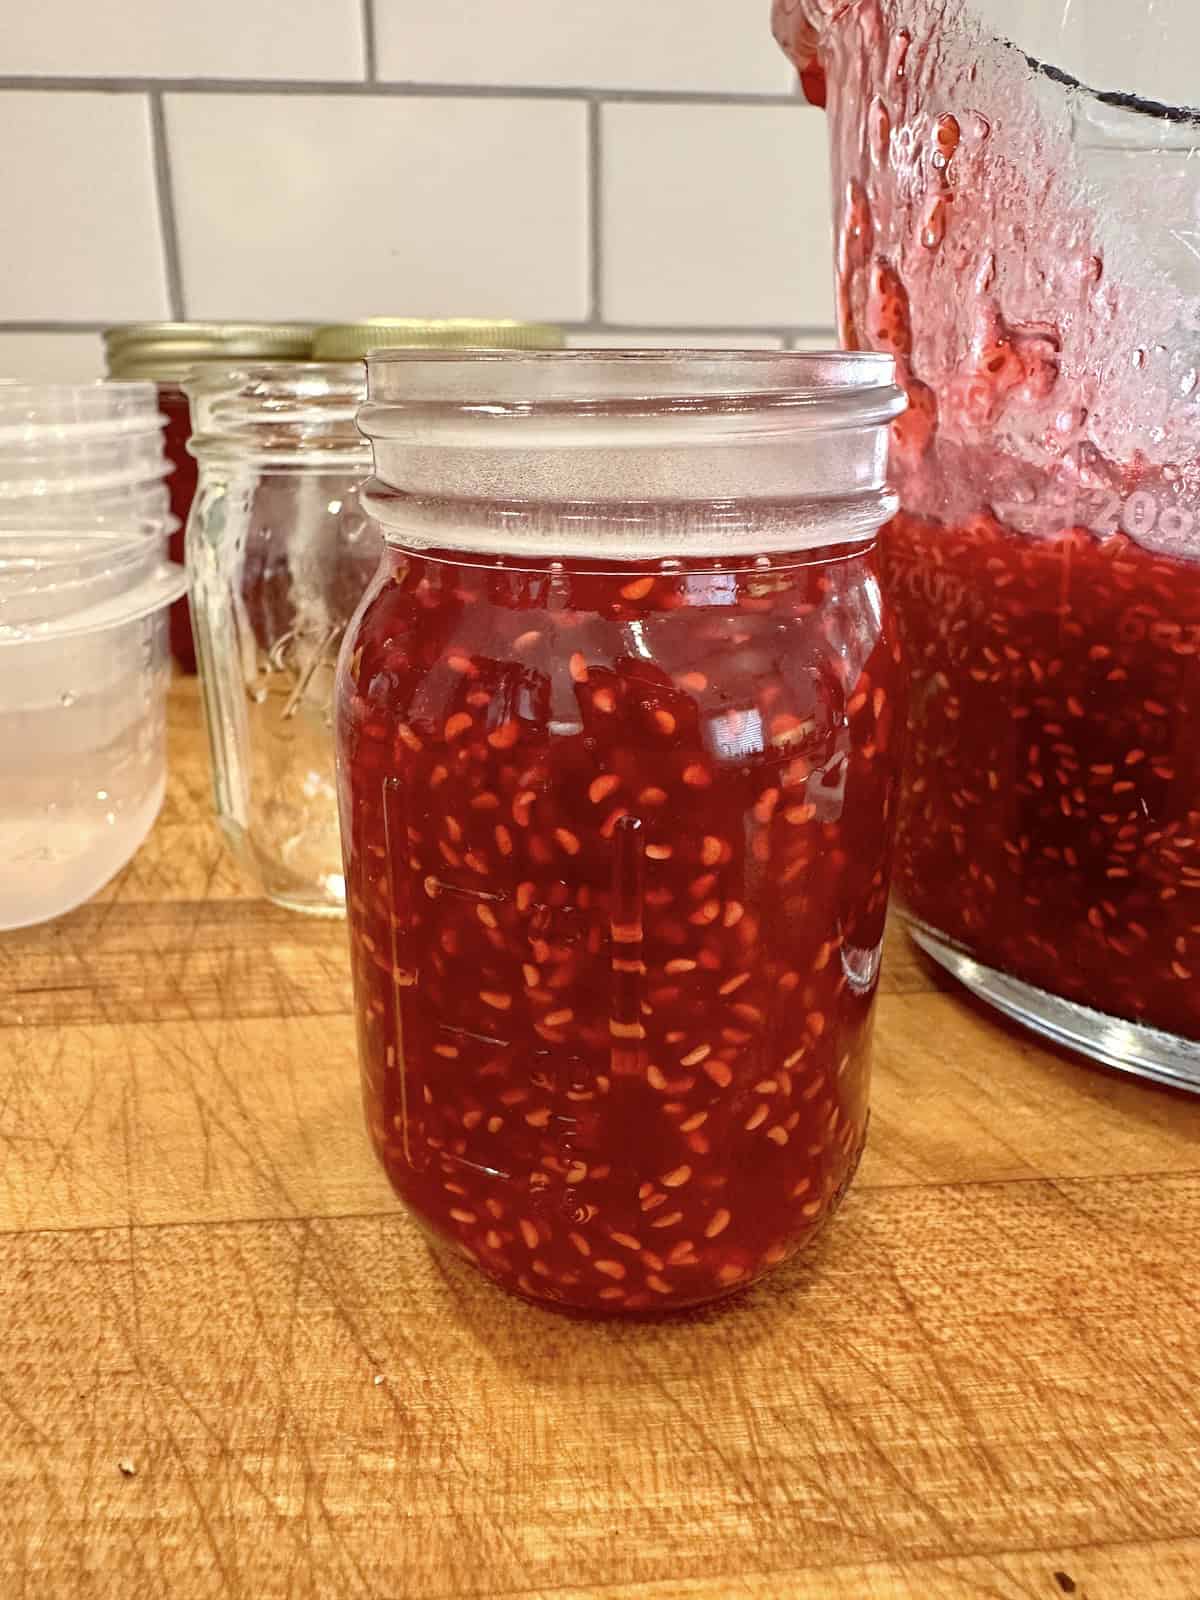
    Step 6: Let the jam cool for at least 10 minutes. Then place a lid on the container, label and either refrigerate or freeze the jars.

    ⭐ Pro Tip

    This raspberry jam recipe is a freezer jam, which means it's not shelf-stable and should be stored in the fridge or freezer, not at room temperature.

    But if you're curious about traditional canning, there's a great resource that walks you through it step by step. Head over to the National Center for Home Food Preservation for helpful tips, techniques and trusted guidelines for water bath canning and much more.

    💭 Recipe FAQs

    Can I use frozen raspberries?

    Yes! This is a great way to continue making homemade jam throughout the year. Just thaw the raspberries and drain them slightly before using.

    What if I leave out the lemon juice?

    Lemon juice is an important ingredient to include. It provides natural pectin and helps the jam thicken.

    I don't have a candy thermometer. How can I tell if the jam is ready?

    The "cold plate test" works great! It's a reliable way to check if your jam is done. Scroll down for the details under How to Know if Your Jam is Done Cooking.

    Can I make seedless raspberry jam?

    Yes. After boiling the crushed berries, but before adding the sugar, lemon juice and salt, press the berries through a sieve, food mill or strainer.

    Return the strained berry mixture to the pan, add the sugar, lemon juice and salt, and continue with the recipe as written.

    Easy small batch raspberry jam in jars with lids.

    🍓Substitutions

    You can swap the raspberries for the same amount of:

    • blackberries
    • boysenberries
    • strawberries
    • blueberries

    Or consider making a "mixed berry" jam and using a combination of any of the above, equal to 4 cups.

    Berry jam is great to have on hand with so many serving options. Serve it with freshly baked basic biscuits, no-knead potato rolls, a cheese board, a charcuterie board or on the side with Handheld Charcuterie Cups.

    ♨️ How to Know if Your Jam is Done Cooking

    It's important to cook the jam long enough for the sugar to reach what's known as the "soft-ball" stage. This gives jam its spreadable consistency.

    Below are two methods to check that the jam has cooked long enough. Use whichever method is most convenient for you.

    Candy Thermometer Test: The soft-ball temperature of sugar will vary depending on the altitude where you live; 220°F is the temperature needed at sea level. Reduce the temperature by 2° for every thousand feet above sea level.

    For example, I live in Boise, Idaho, where the elevation is 2,700 feet, and my jam reaches the soft ball stage at about 215°F.

    Cold Plate Test: Set a small plate in the freezer for a few minutes. Remove a spoonful of the jam mixture from the heat. Pour a small amount of the boiling jam onto the cold plate and set the plate back in the freezer for a minute or two. If the liquid has become like a syrup (similar to the consistency of pancake syrup) and it shows areas of being jelled, it's done.

    If it's still liquid and runny, it needs to boil for a few more minutes. Examples below:

    A raspberry jam on a cold plate with liquid.

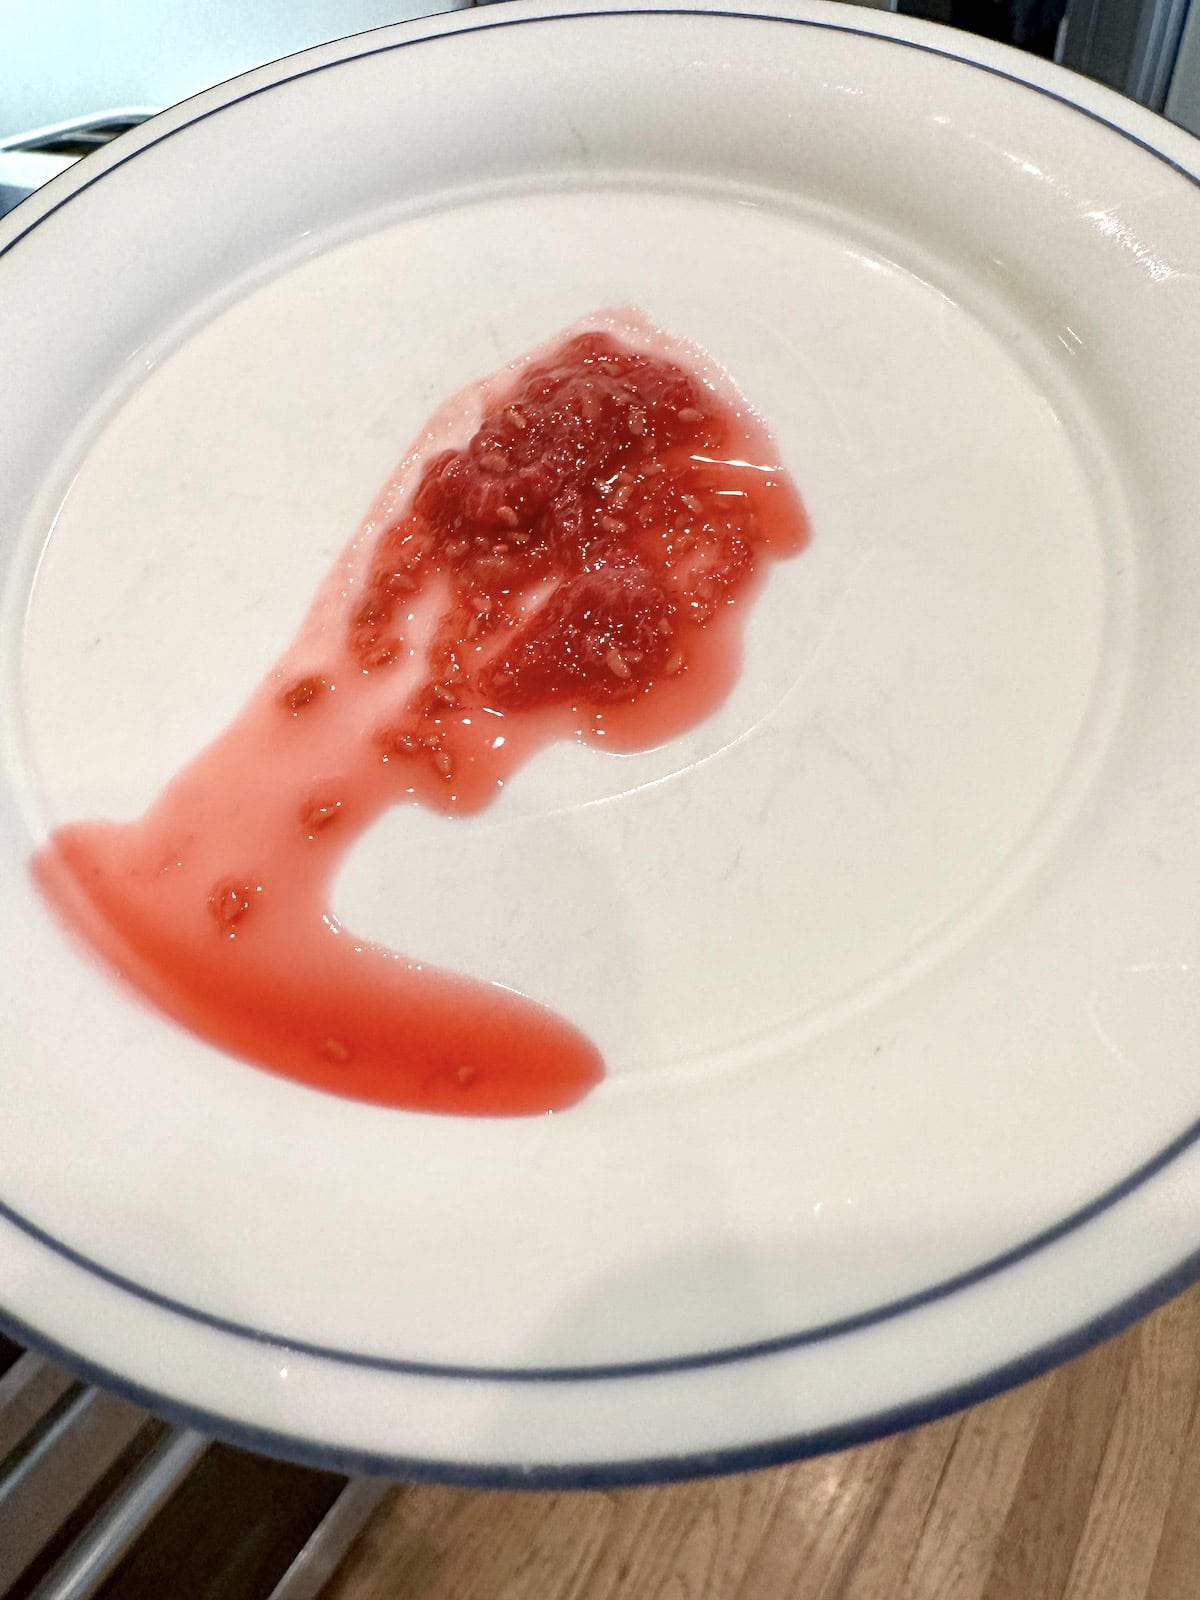
    Cold Plate Test 1: This jam is not ready. There is no syrupy gel around the crushed raspberries and the liquid is running off the cold plate.

    A large drop of raspberry jam on a plate.

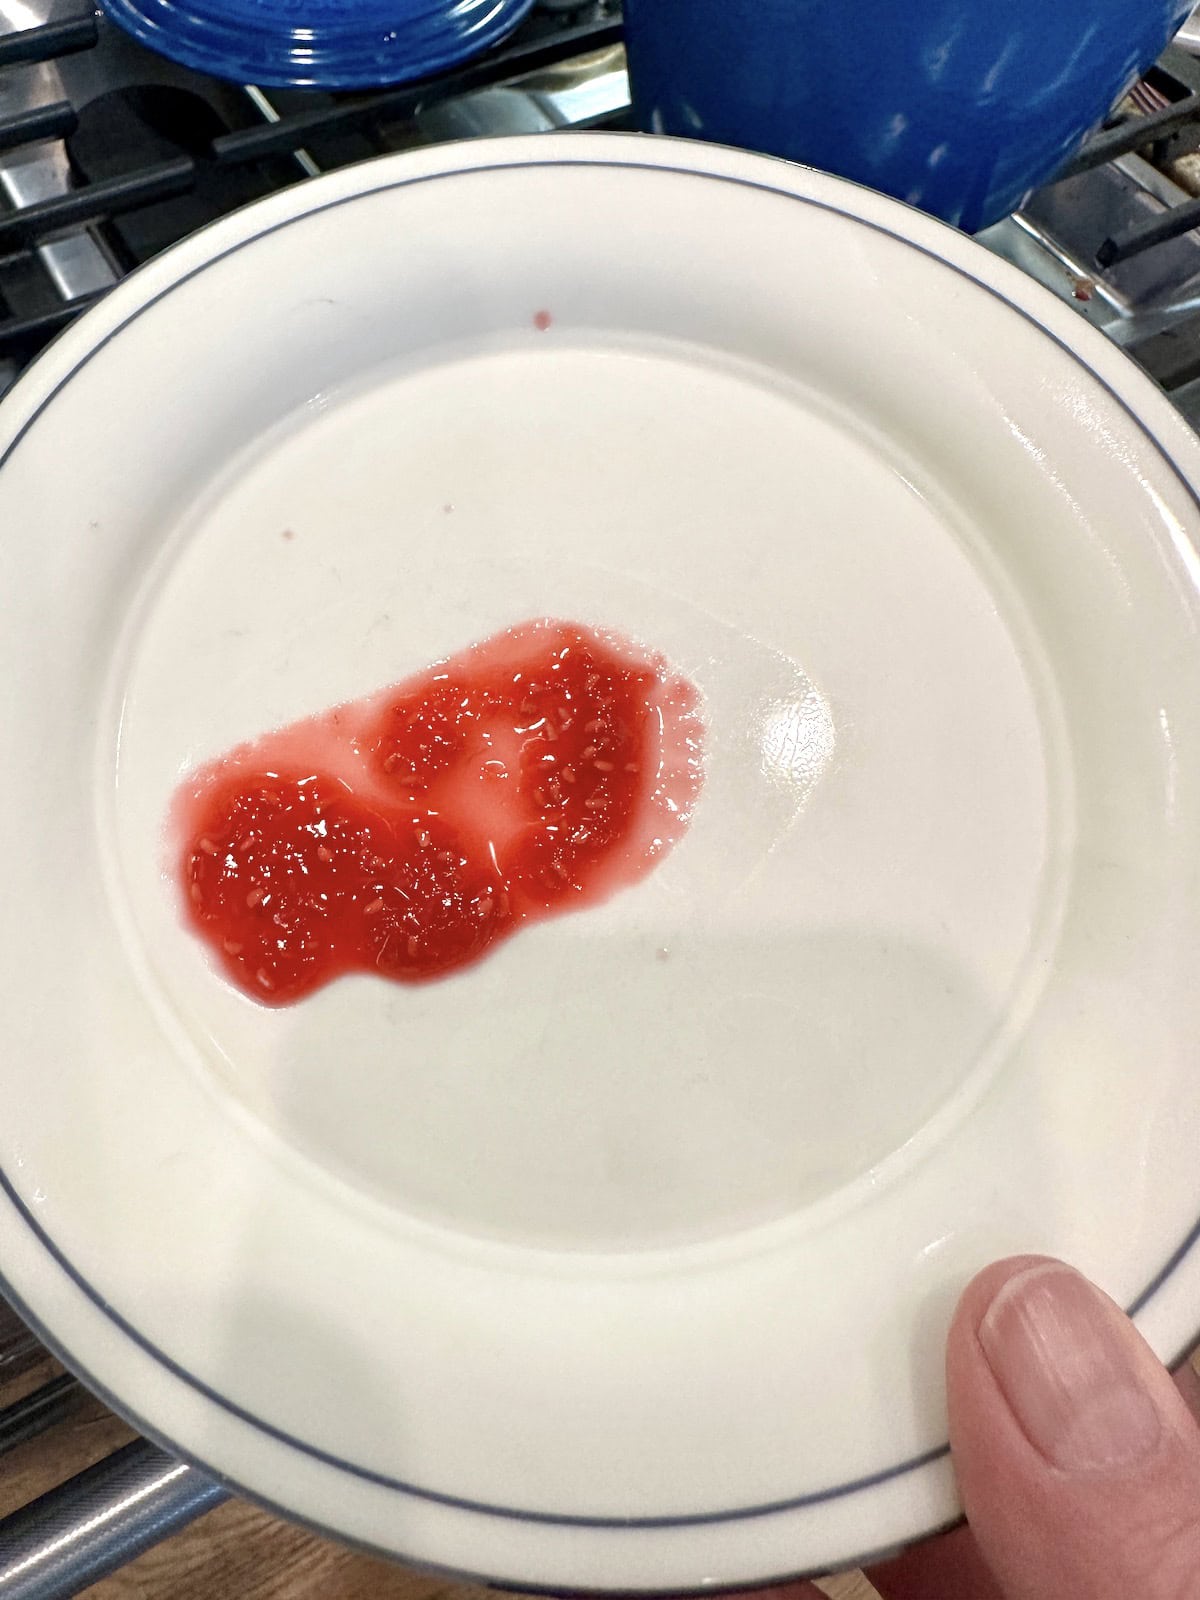
    Cold Plate Test 2: This jam is ready! There are jelled portions of jam around the berries and the liquid has become sticky and has the consistency of syrup.

    ⭐ Pro Tip

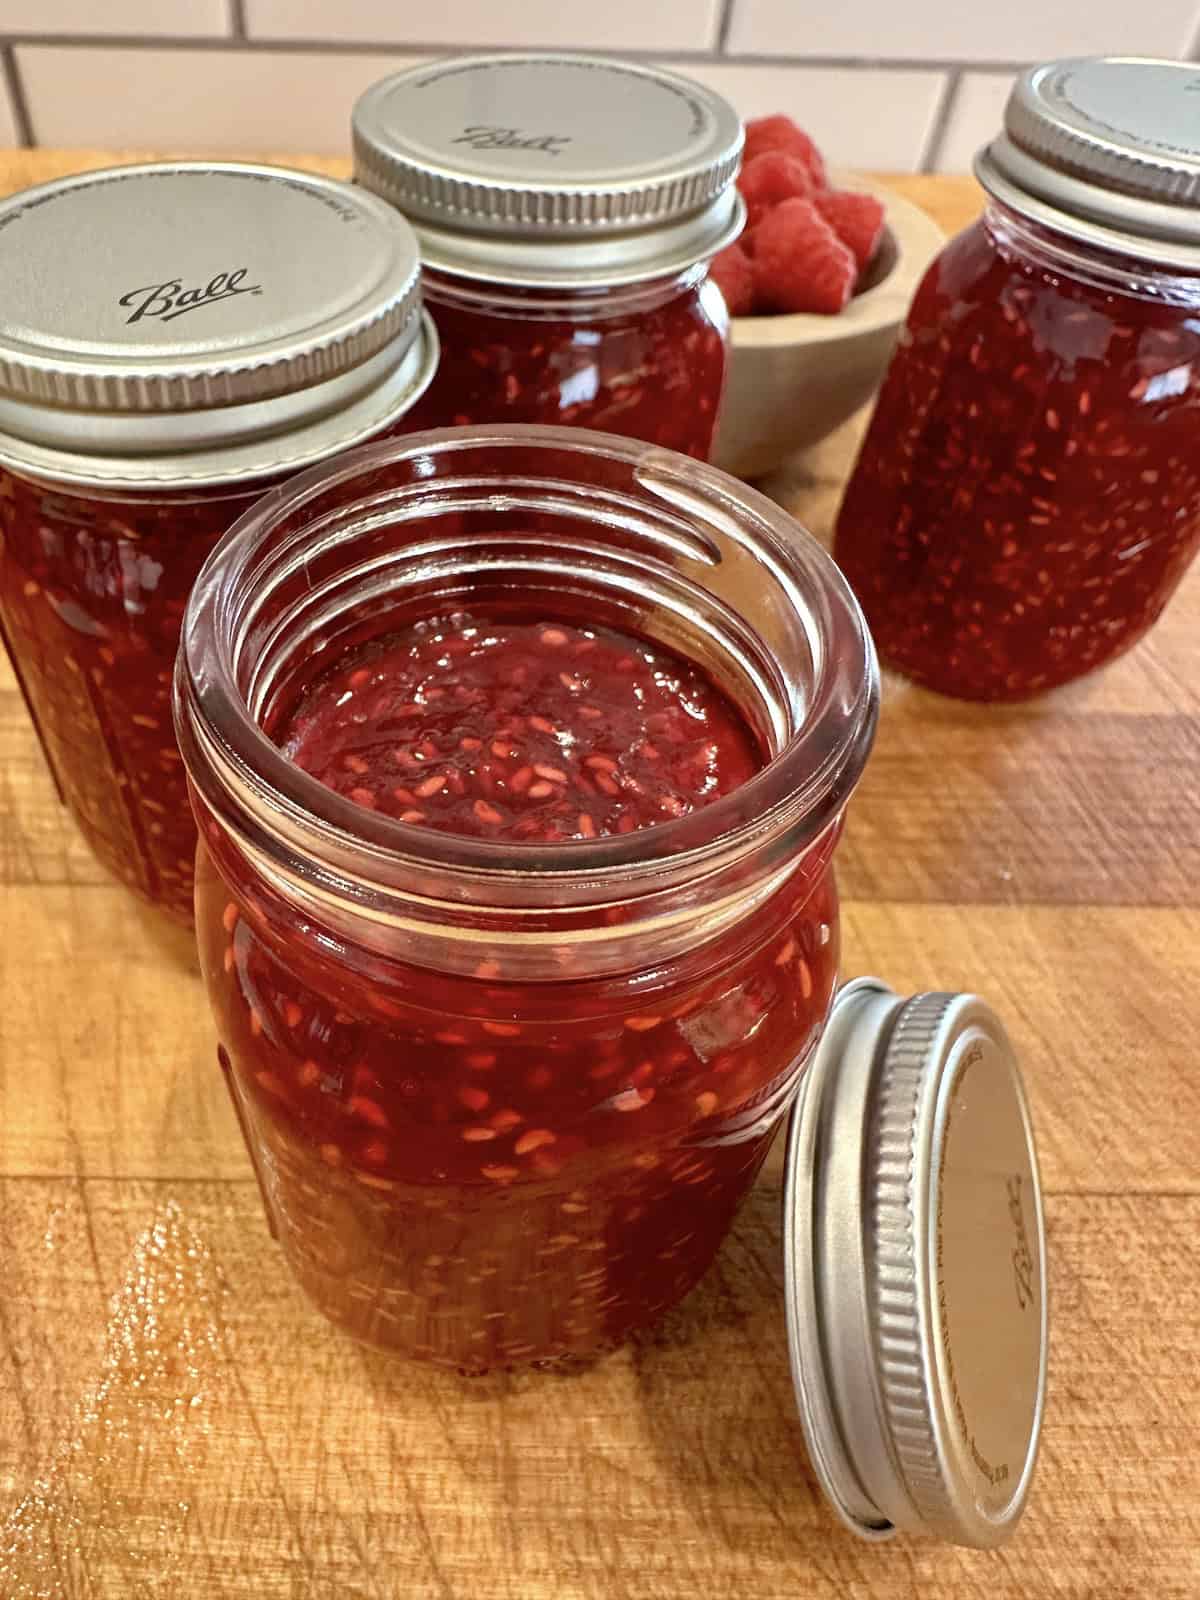
    This recipe makes about 2 ½ cups of jam. I like using small 4-ounce jars for storing it.

    They're the perfect size for tucking into the fridge or freezer, and even better for gifting to friends and neighbors. Use glass jars or any freezer-safe container you have on hand, whatever works best for you!

    👩🏻‍🍳 How to Store Easy Raspberry Jam

    Refrigerator Storage: This raspberry jam keeps beautifully in the fridge. Just spoon it into clean jars or containers, pop on a lid and store it in the refrigerator for up to 3 weeks. (Need it to last longer? Check out the freezer option below!)

    Freezer Storage: The jam can be frozen for up to 1 year. When you are ready to enjoy or share it, thaw the jars or containers overnight in the refrigerator.

    🍽 More Summer Recipes

    Easy Raspberry Jam is the kind of recipe that just feels like summer in a jar. Here are a few more of my favorite recipes for summertime (or any time)!

    • Pasta salad with Italian dressing in a bowl with a fork.
      Pasta Salad with Italian Dressing
    • Homemade pico de gallo in a bowl with lime.
      Pico de Gallo with Jalapeño and Lime
    • Corn soup with sweet potatoes and bacon in a bowl with a spoon.
      Creamy Corn and Potato Soup
    • A serving of moist chocolate zucchini cake on a plate with a fork.
      Chocolate Zucchini Cake

    If you make Easy Raspberry Jam, I'd love to hear how it turned out. Please leave a 🌟🌟🌟🌟🌟 star rating and a comment below. I'm looking forward to hearing from you!

    Recipe

    Easy small batch raspberry jam in jars on a cutting board.

    Easy Raspberry Jam (No Pectin, No Canning)

    Easy homemade raspberry jam without pectin, just raspberries, sugar, lemon, a pinch of salt and a few clever tips. Perfect small-batch recipe for fridge or freezer, no canning needed. This makes about 2 ½ cups of jam. Serve the jam with Homemade Biscuits (Easy, No Yeast) for a comforting and cozy breakfast!
    5 from 3 votes
    Print Rate Pin Recipe
    Prevent your screen from going dark
    Prep Time: 5 minutes minutes
    Cook Time: 20 minutes minutes
    Cooling Time: 20 minutes minutes
    Total Time: 45 minutes minutes
    Servings: 40 tablespoons, approximately
    Calories: 45kcal
    Author: Melinda O'Malley Keckler

    Ingredients 

    • 4 cups raspberries
    • 2 cups sugar - add ¼ cup more for tart raspberries
    • 2 tablespoons lemon juice
    • ⅛ teaspoon salt

    Instructions

    Prepare the Berries and Add Ingredients

    • Rinse the fresh raspberries, remove any stems or leaves.
      Place them in a 2 or 3-quart saucepan on the stove. Use a potato masher or fork to mash some of the raspberries to help release their liquid. Turn the heat to medium-high and bring the raspberries to a boil, stirring frequently.
      4 cups raspberries
    • Add the sugar, lemon juice and salt.
      2 cups sugar, 2 tablespoons lemon juice, ⅛ teaspoon salt

    Cook the Jam Mixture

    • Bring the ingredients to a full boil.
      Continue simmering the mixture, stirring constantly, as it thickens. You may need to lower the heat to medium to keep it from boiling over or from scorching. Keep stirring.
    • For the best results, boil the mixture until the sugar reaches a "soft ball" stage.
      This happens when the temperature of the mixture reaches 220°F, which is the soft ball stage for sugar.
      Use one of the two tests listed below to ensure the jam is ready. It can take anywhere from 10-15 minutes of simmering to reach the soft ball stage. Check after 10 minutes using one of the methods below.

    How to Test the Jam Mixture for the Soft Ball Stage

    • Candy Thermometer Test: The soft-ball temperature of sugar varies depending on the altitude where you live; 220°F is the temperature needed at sea level. Reduce the temperature by 2° for every thousand feet above sea level. For example, I live in Boise, Idaho, where the elevation is 2,700 feet, my jam reaches the soft ball stage at about 215° after roughly 12 minutes of cooking.
    • Cold Plate Test: As you start cooking the jam, set a small plate in the freezer. After 10 minutes of boiling, remove a spoonful of the jam mixture from the heat and place a small amount of the boiling jam onto the cold plate. Set the plate back in the freezer for a couple of minutes. If the mixture is sticky and forms a syrupy gel, it's done. If it's still liquid and runny, the jam mixture needs to boil for a few more minutes.
    • Remove the saucepan from the heat and let the jam mixture set and cool for 10 minutes; the jam ingredients will continue to thicken.

    Fill the Jars

    • TIP: Pour all of the jam mixture into a large 4-cup glass measuring cup, then fill the containers. The pouring spout makes it easier to pour the jam into the jars.
      Pour the mixture into clean jars or freezer-safe containers.
      Leave at least ½ inch of headroom between the surface of the jam and the rim of the jar or container. This allows for the ingredients to expand when frozen.
      Cool for at least another 10 minutes.

    Storage

    • Cover the jars or containers and label. Store in the refrigerator for up to 3 weeks or in the freezer for up to one year.

    Notes

    Refrigerator Storage: This recipe for raspberry jam is meant to be stored in the refrigerator instead of canning it. Store in the refrigerator for up to 3 weeks.
    Freezer Storage: The jam can be frozen for up to 1 year. When ready to enjoy or share it, thaw the jars or containers overnight in the refrigerator.
    This recipe for raspberry jam is not shelf-stable, meaning it can’t be stored at room temperature. For information on how to make jam using the traditional water bath method, please visit the National Center for Home Food Preservation for details. The site is a great resource for canning techniques and safeguards!

    Nutrition

    Calories: 45kcalCarbohydrates: 11gProtein: 0.1gFat: 0.1gSaturated Fat: 0.002gPolyunsaturated Fat: 0.05gMonounsaturated Fat: 0.01gSodium: 7mgPotassium: 19mgFiber: 1gSugar: 11gVitamin A: 4IUVitamin C: 3mgCalcium: 3mgIron: 0.1mg

    Please note, the nutrition details are estimated using a food database. The data above is a rough estimate, not an exact science.

    Did you try this recipe? Leave a comment below or @crinkledcookbook on Instagram, snap a photo and tag it #crinkledcookbook

    More Tasty & Delicious Summer Recipes

    • A serving of tiramisu cake on a plate with a fork.
      Tiramisu Cake for Dessert
    • Yukon gold mashed potatoes in a bowl.
      Yukon Gold Mashed Potatoes
    • Baked beans, franks and pineapple pieces in a baking dish with a spoon.
      Easy Franks and Beans
    • A serving of spring roll in a bowl on a table outdoors with two forks and a plate.
      Spring Roll in a Bowl

    Looking for something?

    Reader Interactions

    Comments

      5 from 3 votes

      Leave a Reply Cancel reply

      Your email address will not be published. Required fields are marked *

      Recipe Rating


      This site uses Akismet to reduce spam. Learn how your comment data is processed.

    1. Jennifer Grabruck says

      December 14, 2025 at 7:12 am

      5 stars
      The recipe was easy to follow and turned out great! I'm excited to share the jam with family and friends for the holidays!

      Reply
      • Melinda O'Malley Keckler says

        December 14, 2025 at 8:48 am

        Wonderful! Thank you for the five-star rating, Jennifer and for coming back and leaving such a nice comment. I'm so glad you enjoyed the jam.

        Reply
    2. Kristen says

      August 13, 2025 at 4:41 pm

      5 stars
      Just made my second batch, my family loved this so much. This recipe made about two jars with of jam and we went through it pretty quickly. Appreciated the ease of making this jam without having to go through all of the extra canning steps.

      Reply
      • Melinda O'Malley Keckler says

        August 14, 2025 at 7:06 am

        Hi Kristen! I'm glad your family enjoyed the raspberry jam. Yay! Thank you for coming back and leaving such a nice comment.

        Reply
    3. Melinda O'Malley Keckler says

      July 16, 2025 at 4:10 pm

      5 stars
      (From Melinda) I hope you enjoy this delicious and super easy homemade raspberry jam recipe. My favorite part about it is you make a small batch! It's a great way to enjoy fresh raspberries.

      Reply

    Primary Sidebar

    Melinda in the kitchen holding a plate of chocolate cake slices.

    Let's dig in!

    I'm Melinda, a self-taught recipe developer from the Pacific Northwest. My recipes have been featured on MSN, Fox News and beyond. But the best part is, I get to share them all here with you!

    Here's My Story

    New Year's

    • A Dutch oven of tender pot roast with vegetables.
      Dutch Oven Pot Roast
    • A baking dish with creamy shrimp and crab dip.
      Delicious Crab and Shrimp Dip
    • Sliced, boneless pork tenderloin with orange sauce and sliced oranges.
      Easy Pork Tenderloin with Orange Sauce
    • Close-up of spiced walnuts roasted with cinnamon and sugar in a jar.
      Spiced Walnuts
    Logos of media outlets where Melinda has been featured.

    Reader Favorites

    • A large spoon dishing up a serving a chicken spaghetti from a baking dish.
      Chicken Spaghetti with Rotel and Velveeta
    • Salmon patties on a plate with onion and a lemon wedge.
      Old Fashioned Salmon Patties Recipe
    • Blue cheese crumbles on top of blended ingredients.
      Blue Cheese Vinaigrette
    • A piece of smoked salmon on the grill.
      Smoked Salmon on a Pellet Grill

    Footer

    ^ back to top

    About

    • Meet Melinda

    Contact

    • Sign up for emails and recipes!
    • Contact

    Disclaimers

    • Privacy Policy & Terms
    • Comment Policy
    • Accessibility Policy

    As an Amazon Associate, I earn from qualifying purchases.

    Copyright © 2019 - 2025 Crinkled Cookbook LLC

    • Facebook
    • Pinterest
    • X
    74 shares

    Rate This Recipe

    Your vote:


    A rating is required
    A name is required
    An email is required

    Recipe Ratings without Comment

    Something went wrong. Please try again.