Easy Raspberry Jam (No Pectin, No Canning)
Easy homemade raspberry jam without pectin, just raspberries, sugar, lemon, a pinch of salt and a few clever tips. Perfect small-batch recipe for fridge or freezer, no canning needed. This makes about 2 ½ cups of jam. Serve the jam with Homemade Biscuits (Easy, No Yeast) for a comforting and cozy breakfast!
Servings: 40 tablespoons, approximately
Calories: 45kcal
Ingredients
- 4 cups raspberries
- 2 cups sugar add ¼ cup more for tart raspberries
- 2 tablespoons lemon juice
- ⅛ teaspoon salt
Instructions
Prepare the Berries and Add Ingredients
- Rinse the fresh raspberries, remove any stems or leaves. Place them in a 2 or 3-quart saucepan on the stove. Use a potato masher or fork to mash some of the raspberries to help release their liquid. Turn the heat to medium-high and bring the raspberries to a boil, stirring frequently.4 cups raspberries
- Add the sugar, lemon juice and salt.2 cups sugar, 2 tablespoons lemon juice, ⅛ teaspoon salt
Cook the Jam Mixture
- Bring the ingredients to a full boil. Continue simmering the mixture, stirring constantly, as it thickens. You may need to lower the heat to medium to keep it from boiling over or from scorching. Keep stirring.
- For the best results, boil the mixture until the sugar reaches a “soft ball” stage. This happens when the temperature of the mixture reaches 220°F, which is the soft ball stage for sugar. Use one of the two tests listed below to ensure the jam is ready. It can take anywhere from 10-15 minutes of simmering to reach the soft ball stage. Check after 10 minutes using one of the methods below.
How to Test the Jam Mixture for the Soft Ball Stage
- Candy Thermometer Test: The soft-ball temperature of sugar varies depending on the altitude where you live; 220°F is the temperature needed at sea level. Reduce the temperature by 2° for every thousand feet above sea level. For example, I live in Boise, Idaho, where the elevation is 2,700 feet, my jam reaches the soft ball stage at about 215° after roughly 12 minutes of cooking.
- Cold Plate Test: As you start cooking the jam, set a small plate in the freezer. After 10 minutes of boiling, remove a spoonful of the jam mixture from the heat and place a small amount of the boiling jam onto the cold plate. Set the plate back in the freezer for a couple of minutes. If the mixture is sticky and forms a syrupy gel, it’s done. If it’s still liquid and runny, the jam mixture needs to boil for a few more minutes.
- Remove the saucepan from the heat and let the jam mixture set and cool for 10 minutes; the jam ingredients will continue to thicken.
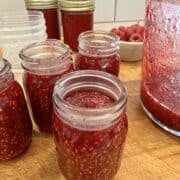
Fill the Jars
- TIP: Pour all of the jam mixture into a large 4-cup glass measuring cup, then fill the containers. The pouring spout makes it easier to pour the jam into the jars. Pour the mixture into clean jars or freezer-safe containers. Leave at least ½ inch of headroom between the surface of the jam and the rim of the jar or container. This allows for the ingredients to expand when frozen.Cool for at least another 10 minutes.
Storage
- Cover the jars or containers and label. Store in the refrigerator for up to 3 weeks or in the freezer for up to one year.
Notes
Refrigerator Storage: This recipe for raspberry jam is meant to be stored in the refrigerator instead of canning it. Store in the refrigerator for up to 3 weeks.
Freezer Storage: The jam can be frozen for up to 1 year. When ready to enjoy or share it, thaw the jars or containers overnight in the refrigerator.
This recipe for raspberry jam is not shelf-stable, meaning it can’t be stored at room temperature. For information on how to make jam using the traditional water bath method, please visit the National Center for Home Food Preservation for details. The site is a great resource for canning techniques and safeguards!
Nutrition
Calories: 45kcal | Carbohydrates: 11g | Protein: 0.1g | Fat: 0.1g | Saturated Fat: 0.002g | Polyunsaturated Fat: 0.05g | Monounsaturated Fat: 0.01g | Sodium: 7mg | Potassium: 19mg | Fiber: 1g | Sugar: 11g | Vitamin A: 4IU | Vitamin C: 3mg | Calcium: 3mg | Iron: 0.1mg
